
 Tiếng Việt
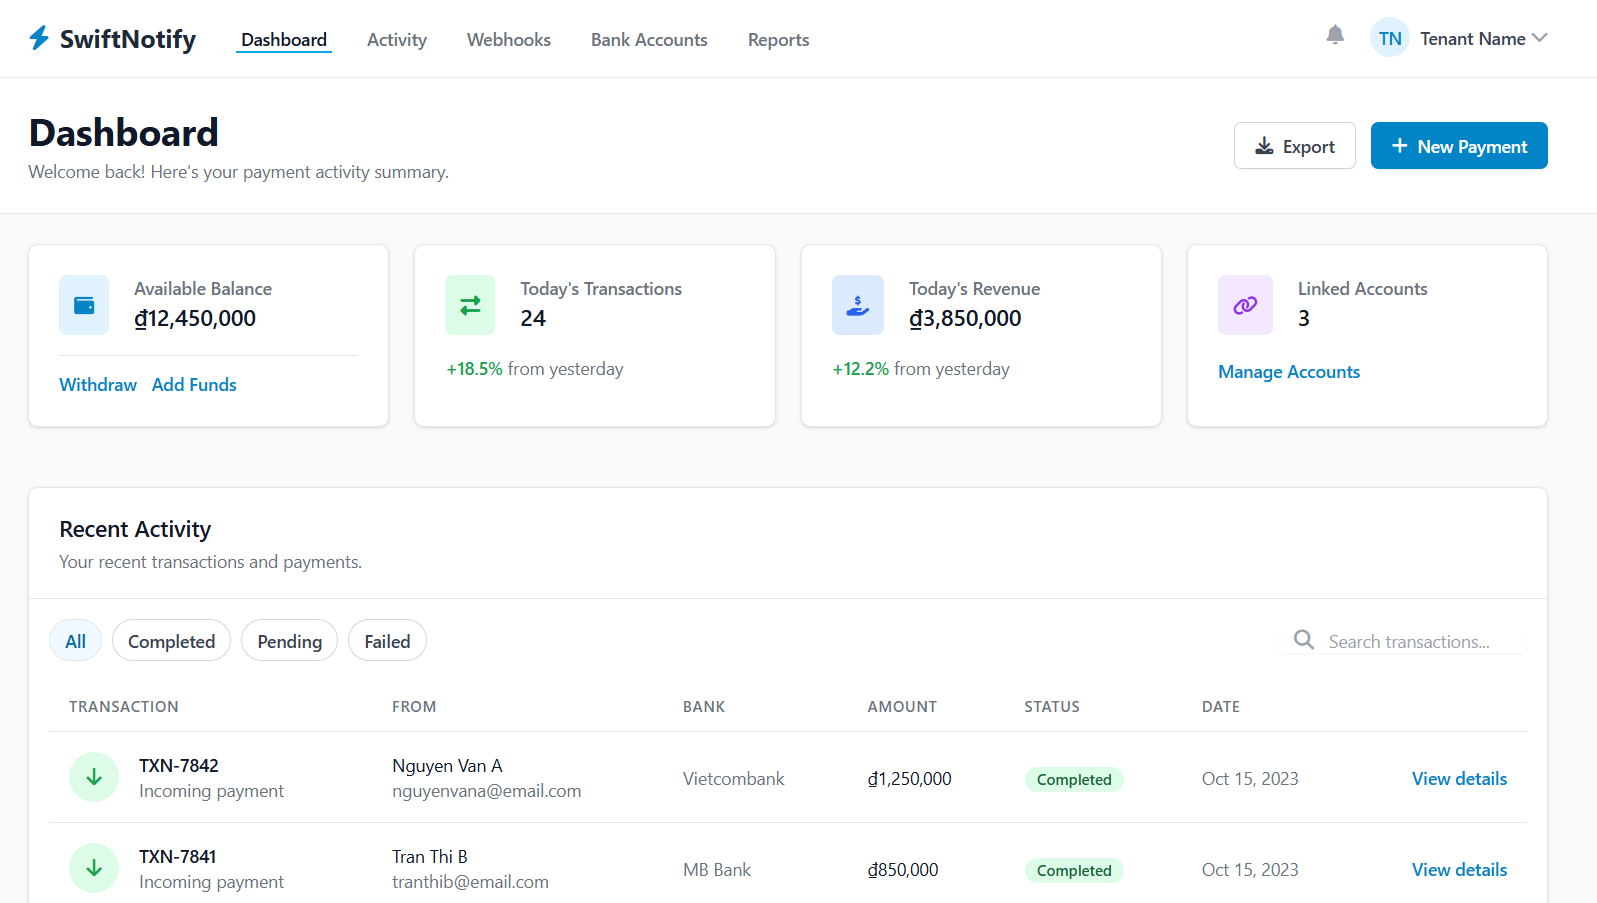
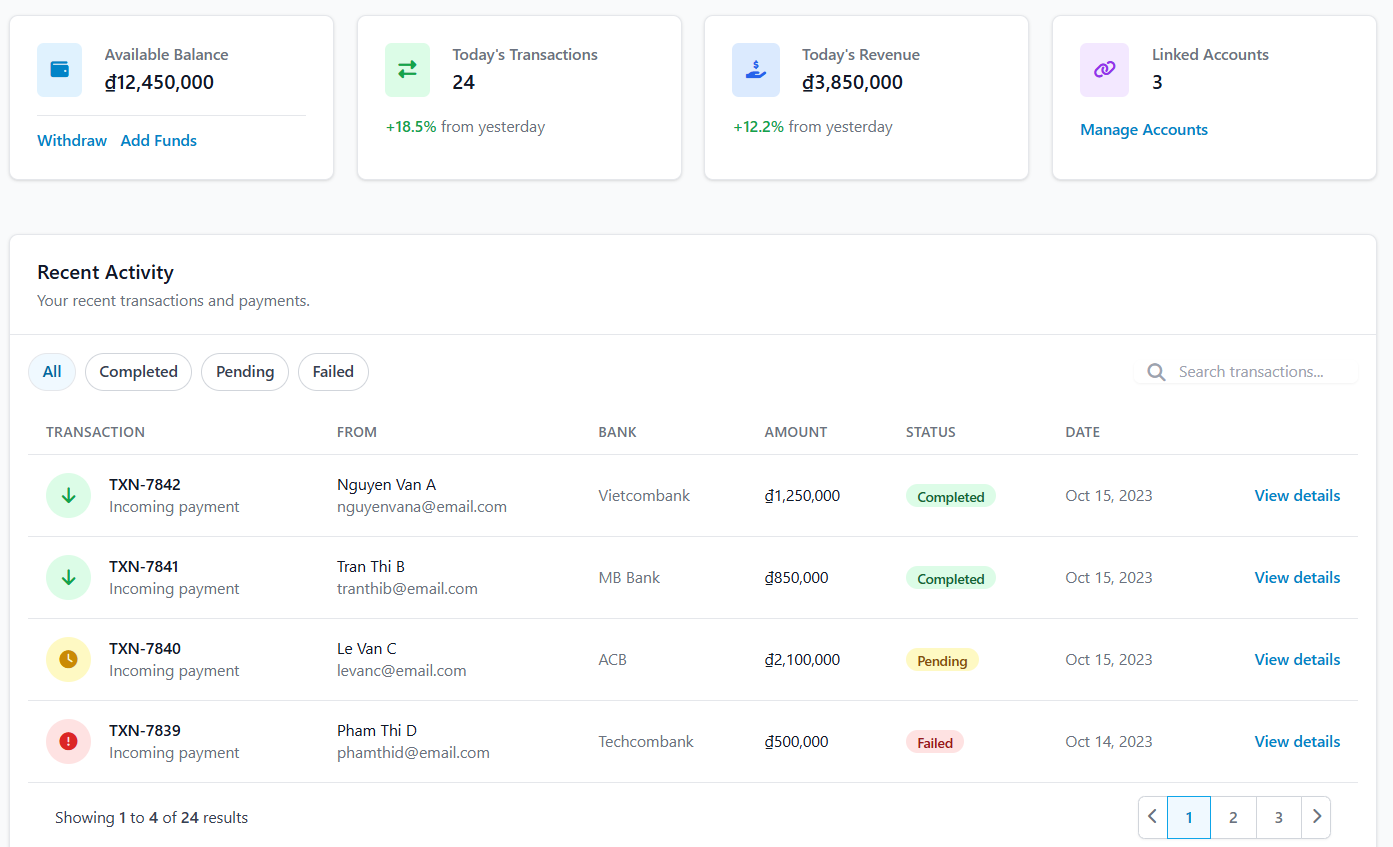
SwiftPay AutoConfirm is ideal for businesses that want instant notification and automated order processing. With real-time transaction updates delivered via webhook, you can streamline your workflow while keeping full control of your funds.
Note: This is one-way notification only. The service does not handle the actual money transfer—it only informs you when a payment has been made.
Pros
- Real-Time Notification: Instantly know when a customer makes a transfer.
- Automatic Processing: Connect to your system to confirm orders, update inventory, or trigger fulfillment.
- Multi-Bank Support: Works with Vietcombank, MB Bank, ACB, Techcombank, TPBank, Sacombank, BIDV, and more.
- Free Tier: Receive up to 50 order notifications per month for free.
Cons
- Funds Remain in Your Bank Account: SwiftPay AutoConfirm only notifies—you still receive money in your own bank.
- Minimum Transfer Amount: 100,000₫ per transaction.
- Reconciliation Timing: Transfers are reconciled twice a week, so notifications may be grouped for processing.
Webhook Configuration Tutorial
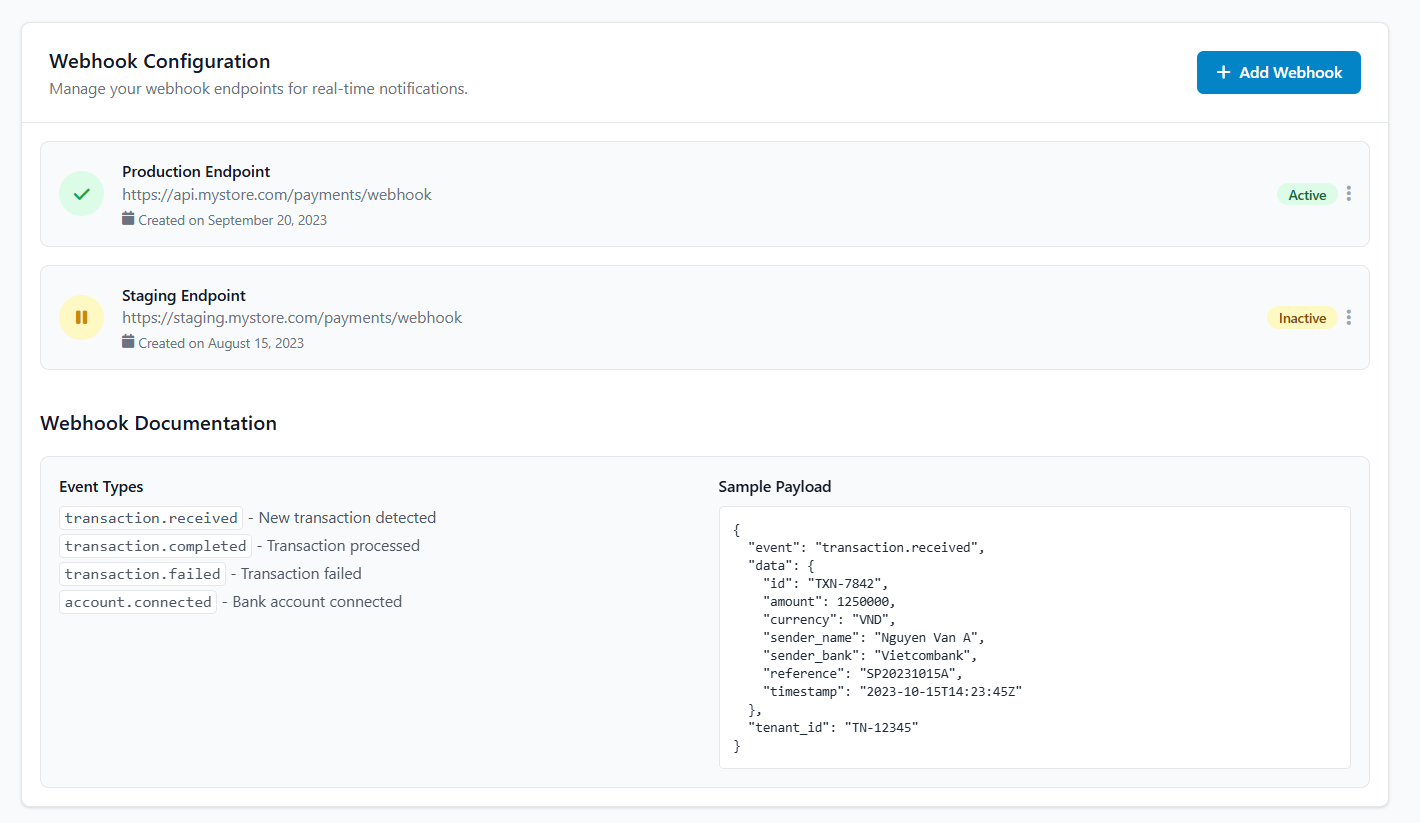
You can manage multiple endpoints for production and staging environments to integrate seamlessly with your system.
Step 1: Add a Webhook Endpoint
-
Navigate to Webhook Settings in your SwiftPay AutoConfirm dashboard.
-
Click “Add Webhook”.
-
Enter your endpoint URL:
-
Production Endpoint:
Status: Active
-
Staging Endpoint:
Status: Inactive
-
Save the webhook. You can add multiple endpoints for testing or different environments.
Step 2: Event Types
SwiftPay AutoConfirm supports several webhook events:
| Event | Description |
|---|---|
transaction.received |
A new transaction has been detected. |
transaction.completed |
Transaction has been processed successfully. |
transaction.failed |
Transaction failed. |
account.connected |
Bank account successfully connected. |
Step 3: Sample Payload
When a webhook event is triggered, your endpoint will receive a JSON payload like this:
Fields explained:
-
event– Type of webhook event -
data.id– Transaction identifier -
data.amount– Transaction amount -
data.currency– Currency code (VND) -
data.sender_name– Name of the sender -
data.sender_bank– Bank of the sender -
data.reference– Reference provided with the transaction -
data.timestamp– Time of the transaction in ISO 8601 format -
tenant_id– Your unique tenant identifier
Step 4: Handle Webhook in Your System
-
Configure your server to accept POST requests at the webhook endpoint.
-
Parse the JSON payload.
-
Take action based on the event type, for example:
-
transaction.received→ confirm order in your system -
transaction.completed→ mark payment as completed -
transaction.failed→ notify the customer or retry
-
Tip: Always respond with HTTP 200 OK to acknowledge successful receipt of the webhook.